.png)
Step 1: Selecting the Search module
After completing the steps explained in the Create a New Project and Add Unmanaged Media: Ingest sections, you should now have a managed project with at least one managed media with which to begin working on editing a sequence. More often than not, editing projects require multiple media, which is also subject to change throughout a project's duration. When one considers the collaborative environment in which multiple editors are accustomed to work in, it is only natural additional material to work on your project. In order to search media and material that may be useful for your newly created project, select the Search module's "Lens" icon on EditMate Panel's main navigation bar.

Users can also double-click on media in the search result grid and have these automatically play in Adobe Premiere's Source player.
Step 2: Search Filters and Term
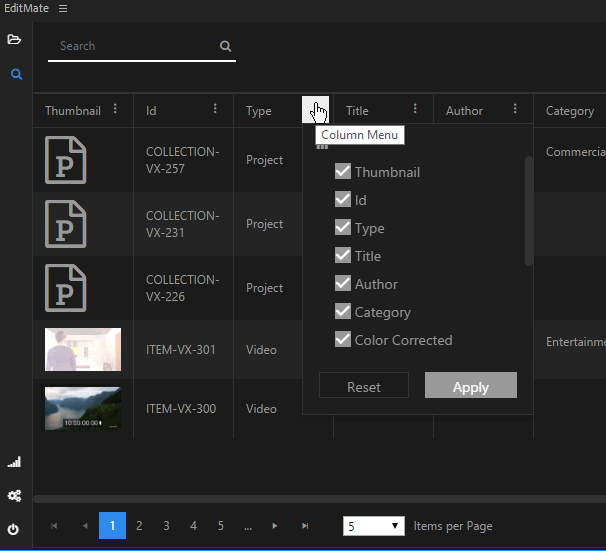
With the Search module open, users are able to view a single unified grid with which to search for objects in EditMate's media repository. In addition to offering a free text search field, users are able to select and filter the object types they wish to search for, and how these are sorted. It is important to note that all metadata in any of the columns is considered searchable.
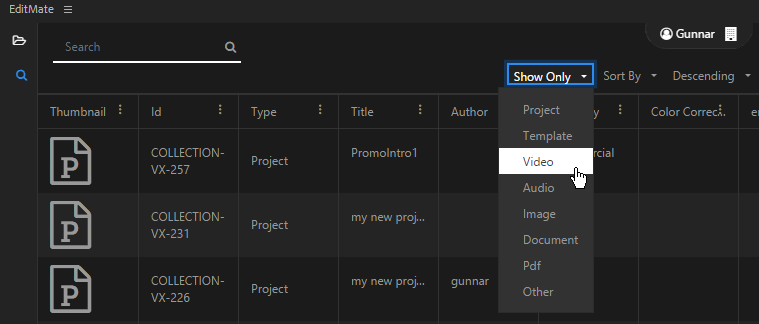
In this walkthrough you will be searching for additional media assets for your new project. Before entering a search term in the free text search field, select the "Video" option from the "Show Only" dropdown. This will filter out all other object types and display only those matches which are considered as videos. When selecting multiple object types it is important to note the Type column indicates the object type.
Continue by entering a search term into the free text search field and initiate the search by selecting and clicking on the "Lens" icon.
Step 3: Viewing Search Results
After the search is performed, the Search module will display all the matching search results in the search grid. On each row, a thumbnail of the video and metadata are displayed for the respective result. This allows users to evaluate a media asset, before deciding on whether to open, or import the object.
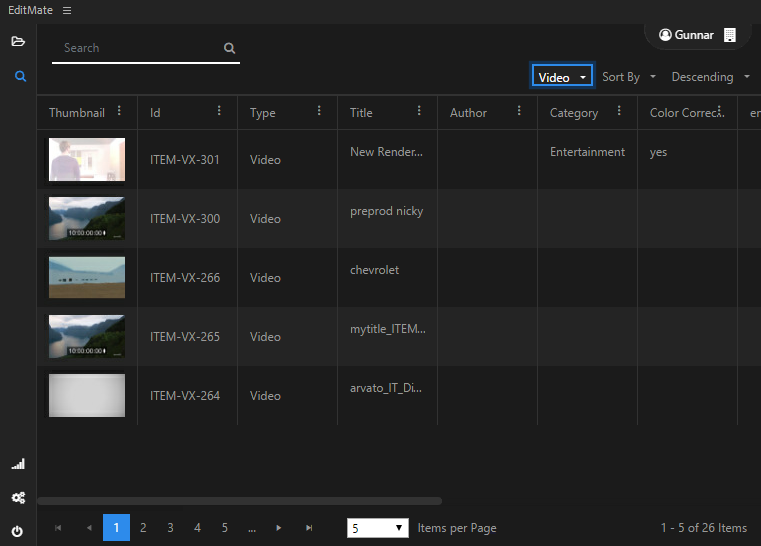
Users also benefit from the possibility of sorting search results, by metadata type and display the values in ascending or descending order.
It is important to note that, depending on the quantity of results, not all of the results will be able to be displayed within a single window at once. If this is the case, remember to use the "Page" function at the bottom of the dialog window.
Step 4: Selecting Media for Import
Once you have found media you wish to include into your project, simply select on the media results row. You will now notice that action buttons available next to the free text search field will now display, among others, the "Import" button. Selecting and clicking on this button will initiate the import process for the selected object. In this case we are selecting a single media asset for import.

Alternatively, users are able to import multiple search results with a single action. This is made possible by holding the "Ctrl" button when selecting objects from the search results. Objects selected this way will remain highlighted and be included when initiating an import.