.png)
Creating diagrams with the Workflow Designer begins with a simple step. Users are able to drag-and-drop elements from the diagram menu onto the board.
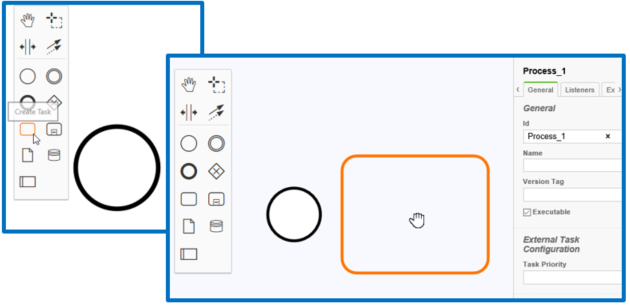
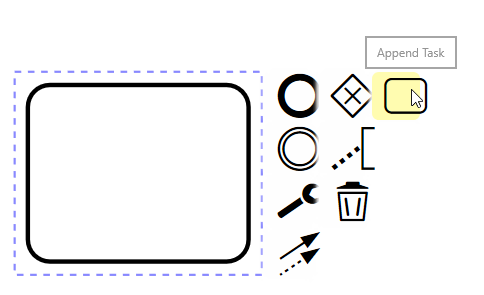
Once an element is placed on the board, users are able to specify "append" additional elements to a selected element.
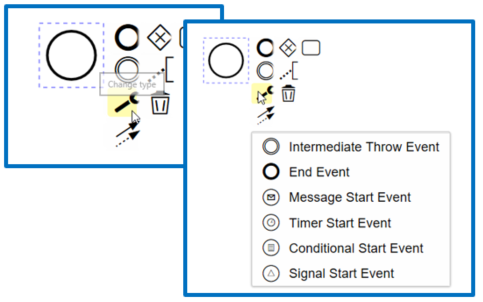
Users are also able further narrow the nature of an element based on type. However, an element class cannot be changed to another element class on the diagram.
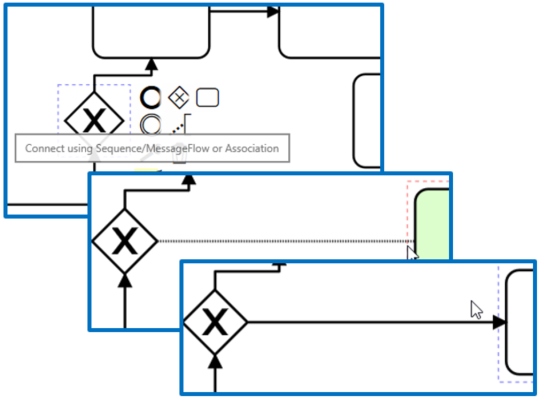
Appendages, as well as the connectors between elements, can be deleted at will and inserted using any element as an anchor.
Attributes and Tasks
When creating a workflow in the Workflow Designer, each element in the diagram requires its attributes to be defined based on the element's nature and each attribute's entry specified. Both of which occur in the Properties and Executions Menu within Workflow Designer.

Clicking on an element on the diagram will automatically refresh the Properties and Executions Menu, displaying all the attributes available to that element type, as well as all of the already specified entries for those attributes.
Users familiar with both BPMN 2.0 and Camunda will be equally familiar with many of the attributes and their respective definitions in the Properties and Executions Menu. The VidiFlow Workflow Designer offers dedicated tasks tailored for modelling business processes common in the media industry that are based on the BPMN service task functionality.

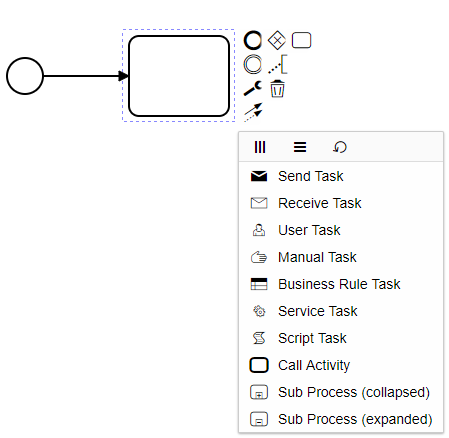
Accessing the VidiFlow service tasks is done by inserting a Task into the workflow, clicking on the wrench symbol and selecting "Service Task":
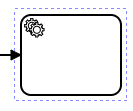
The task in question should now have a gears icon in the top left corner:
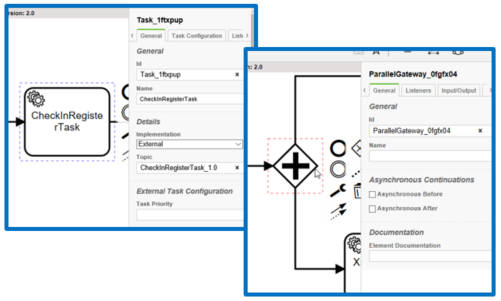
When selecting newly created service tasks, further configuration options are listed in the "Task Configuration" tab under the Property panel.
After a particular VidiFlow service task has been selected, a description of the task is shown in the panel. Additionally, one is able to select the task version intended for use. Configuration of the individual VidiFlow service tasks in the workflow is achieved by selecting the "Input/Output" tab where the tasks input and output parameters become visible and accessible:
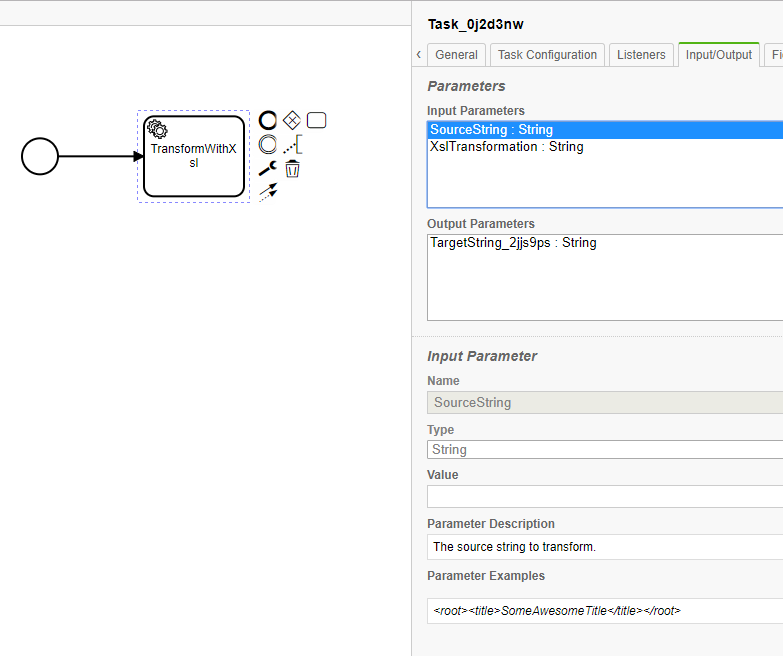
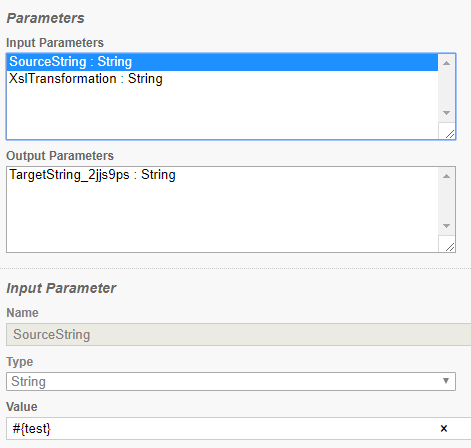
The Input Parameters box lists all input parameters made available for the selected task. The Output Parameters box lists all the output parameters made available for the selected task. Selecting a particular parameter will express a table with additional information, such as a parameter description, and where applicable, an example of possible parameter values.
All parameters are typed into either those which can be filled with variable values (input parameter) or those to which a variable can be assigned to hold the parameters value (output). This is the most notable difference when selecting input or output parameters:
|
Input Parameter |
Output Parameter |
|
|
|
|
Allows one to assign a value to the parameter. The intended value is expressed in Expression Language and entered in the to "Value" field. |
Allows one to specify a variable name in the "Name" field. The parameter's value will be accessible in subsequent tasks by referring to a variable of the selected name. |
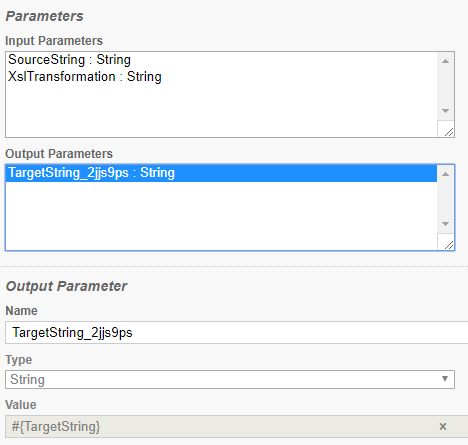
Please note that when choosing names for a tasks output parameters – and hence variable names – it is strongly recommended to have unique variable names for each task instance. An example of this is when utilizing parallel execution, it is possible to have a task of a given type in multiple scopes. When this is not compensated by making the output parameter names unique, race conditions when reading the variables might occur.
For some input and output parameter values and their naming, special considerations will apply, see the Input and Output Parameters sections.
It is recommended that users are aware of the available Task Agents as well as their respective definitions.